User Guide
Welcome to GlaShield!
This app is designed to support your glaucoma treatment. Let's easily track your daily records and help manage your precious eye health.
💡 This page explains the basic usage of the app and detailed operation instructions for each feature
Table of Contents
1. Getting Started
The first time you open the app
The first time you open the app, you will see two welcome pages.
- 1 After reading the first page, tap “Next”.
- 2 The second page is about reminders. Tap “Turn on notifications (recommended)”, then allow notifications on the screen that follows. To decide later, tap “Set up later”.
- 3 Tap “Register your first eye drop” to open the screen for adding an eye drop alarm (see “3. Eye Drops & Alarms”). To do it later, tap “Later”.
To skip the welcome pages, tap “Skip” in the top right corner.
Allow notifications
The app needs permission to send notifications so it can remind you when it is time for your eye drops.
If you did not allow notifications on the welcome pages, you will see “Notification Permission for Eye Drop Alarms” the first time you save an alarm. Tap “Allow”, then allow notifications on the screen that follows.
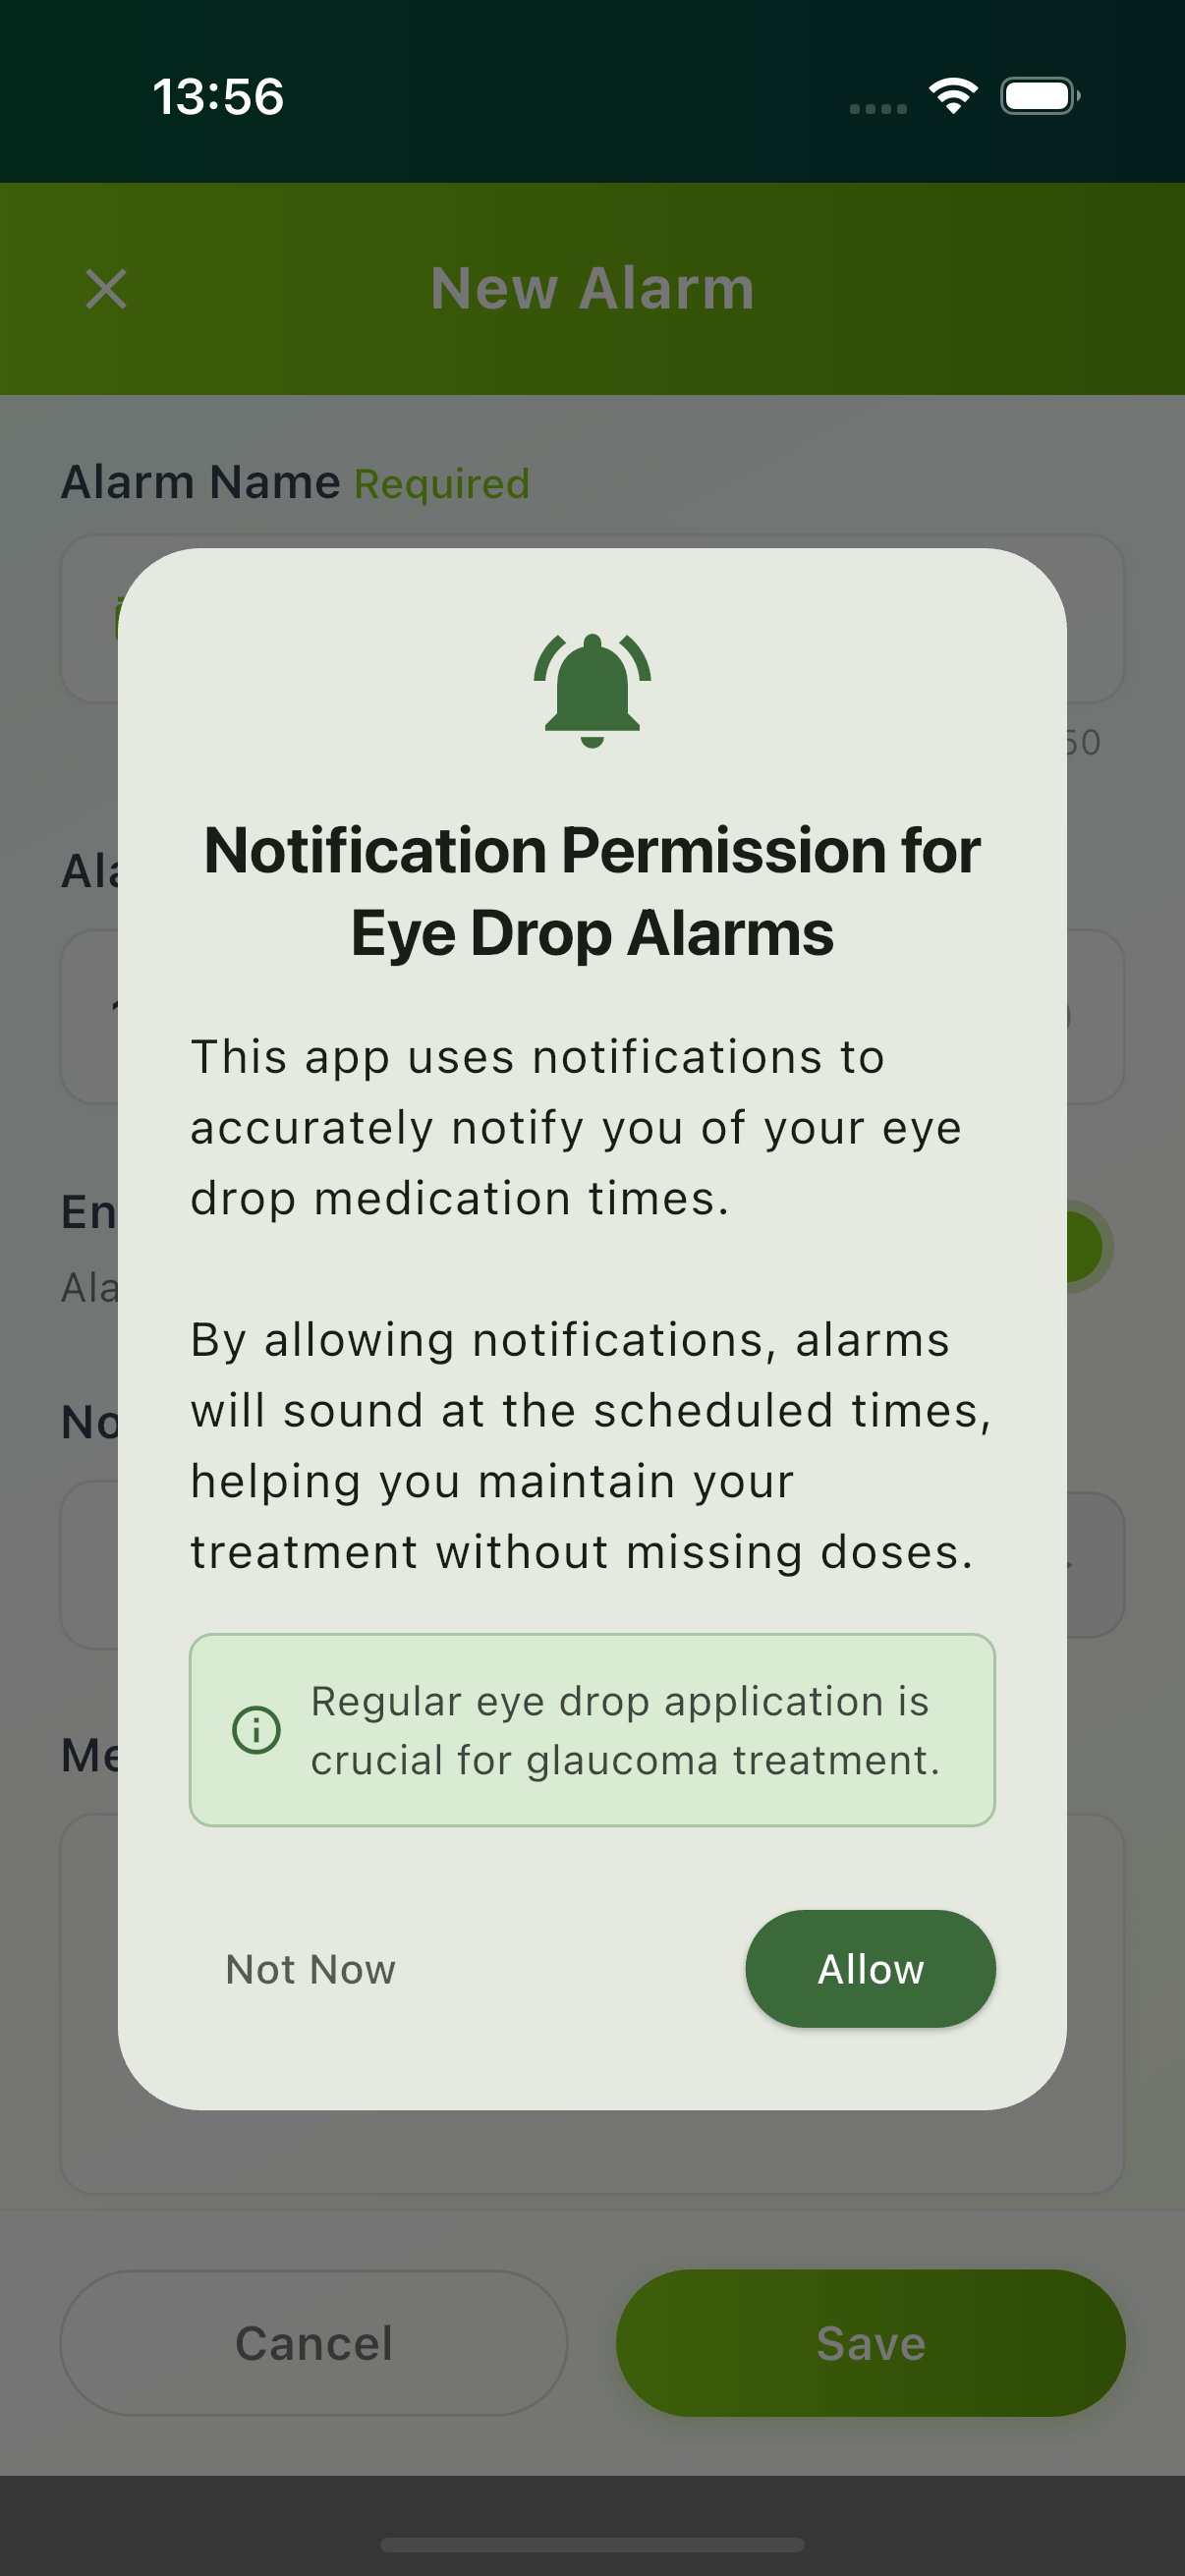
📱 Shown the first time you save an alarm
On Android: If you see “Allow exact alarms”, tap “Open Settings” and allow “Alarms & reminders”. When you are done, use the back button to return to the app.
On iPhone: If you see “About Ads”, tap “Continue” and make your choice on the next screen. The app works the same either way.
How the screen is organized
There are three tabs at the bottom of the screen. Tap a tab to switch screens. The app always opens on the Eye Drops screen.
Eye Drops
Check off today's eye drops and see past records. You also add eye drops and alarms from here.
Visits
Your visit records and the eye pressure graph.
Settings
Font size, notifications, backup and more.
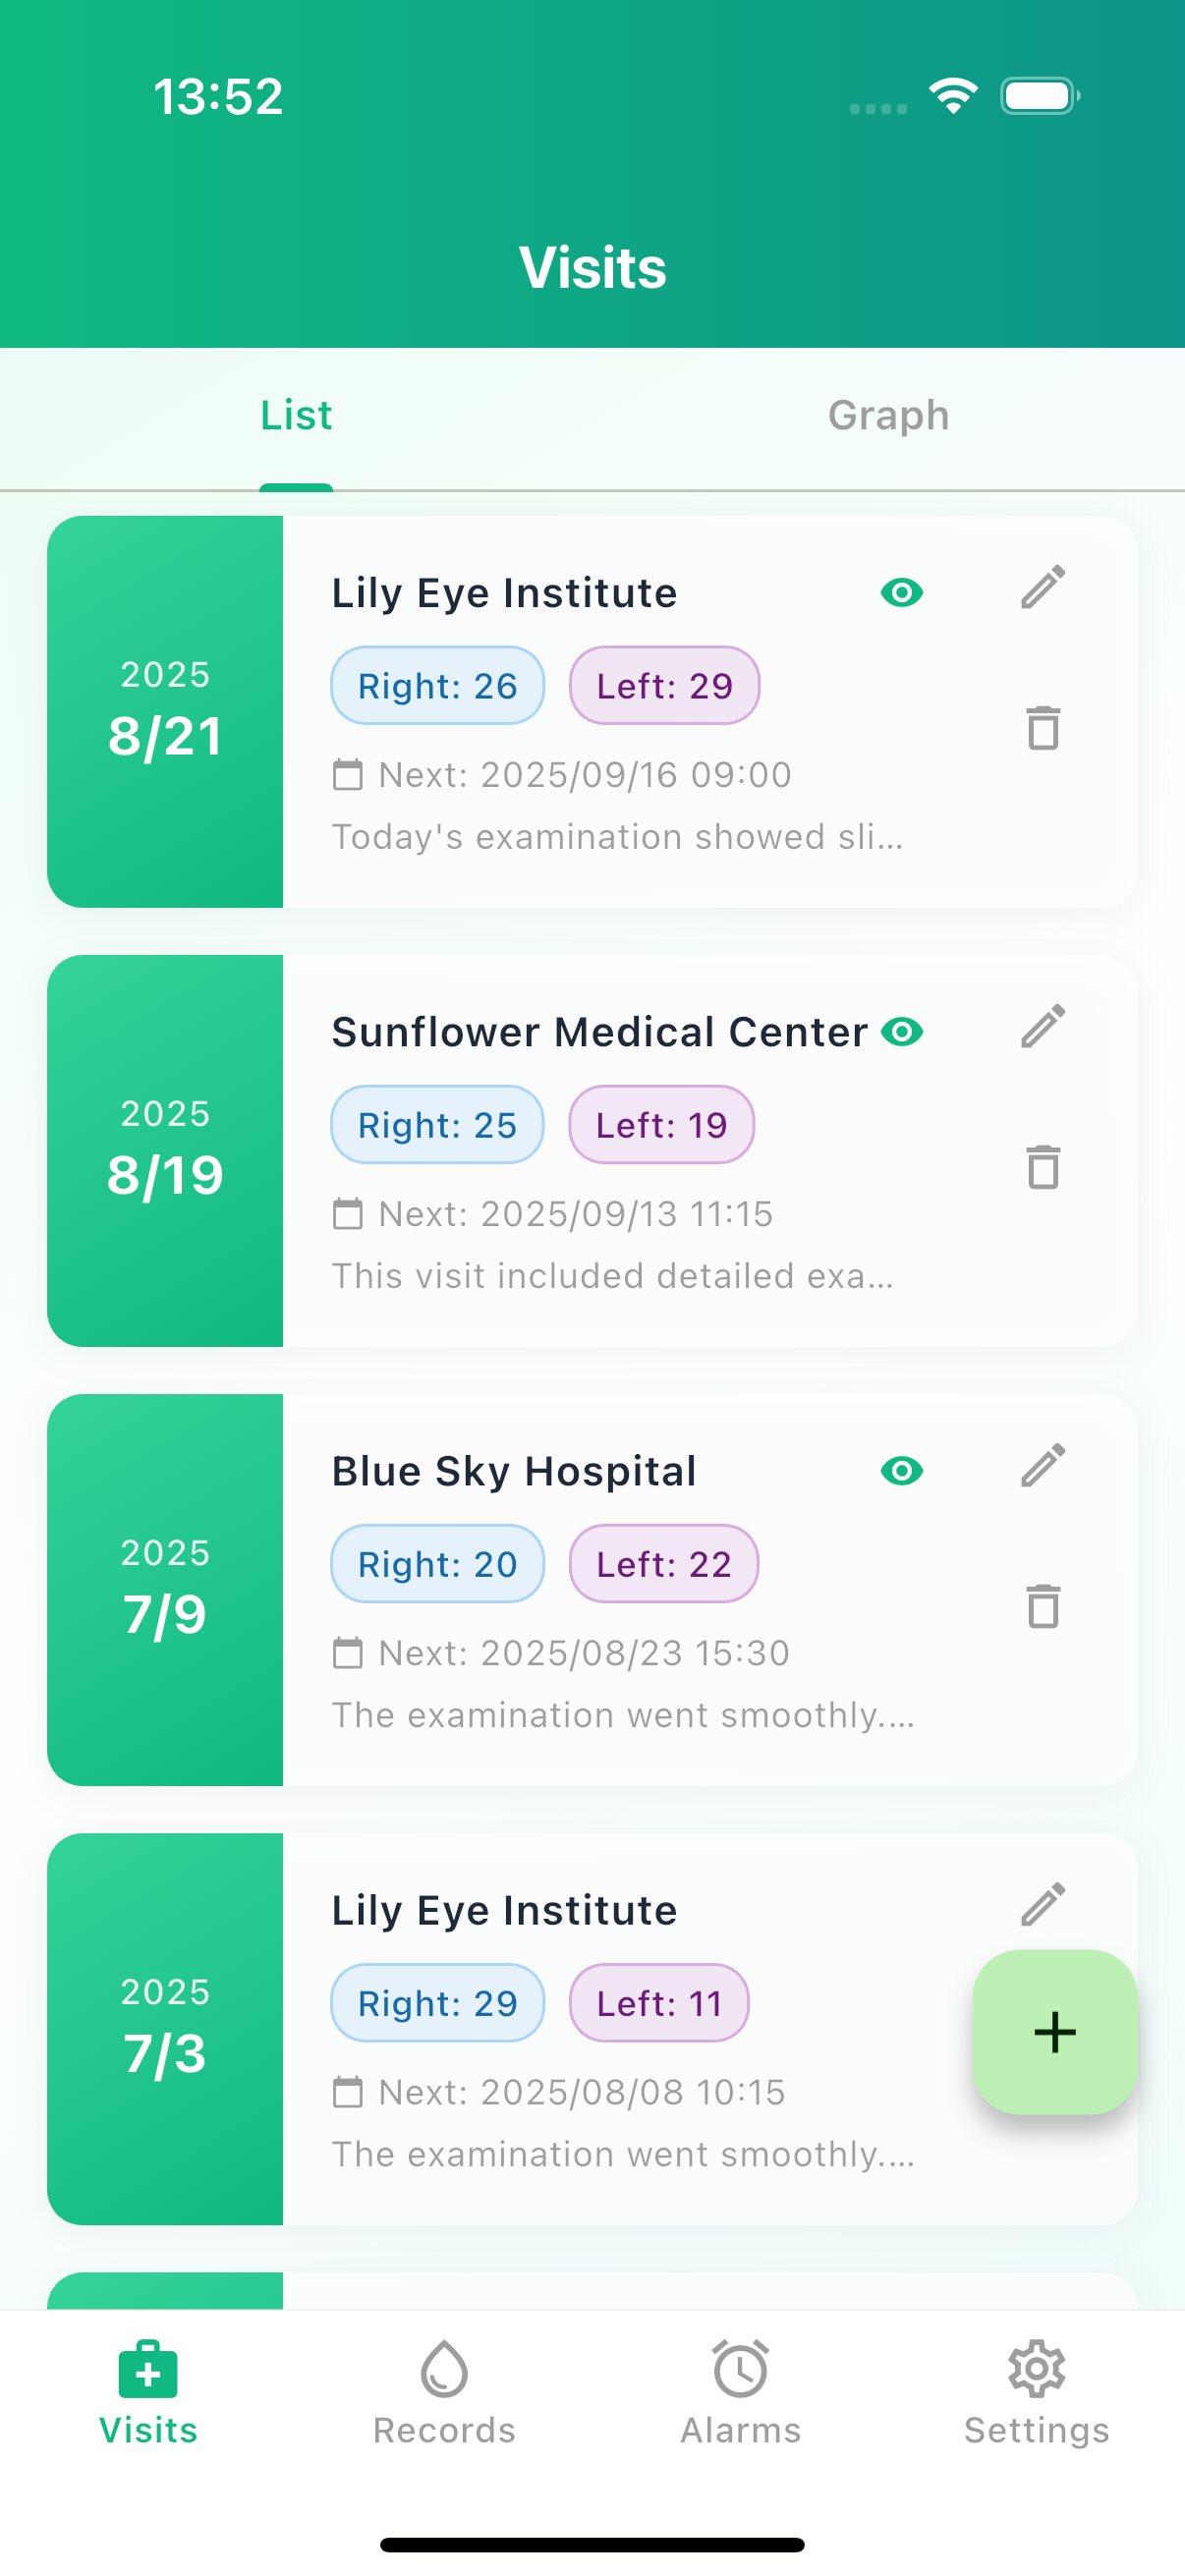
📱 Main screen (three tabs)
2. Eye Drop Records
Purpose: Record your eye drops every day so you do not miss a dose.
Check off today's eye drops
At the top of the Eye Drops screen is a card with today’s date, such as “Eye drops for Sat, Sep 26”. Your eye drops are listed in order of time.
- 1 After using an eye drop, tap “I took it” next to it.
- 2 A check mark appears with the time, such as “Recorded at 08:02”.
If the next dose of the same eye drop is already due and an earlier dose has no record, that row shows “08:00 dose: skip it if you didn't take it”, so you do not take two doses at once. If you took it but forgot to tap, tap “I had taken it” to record it at the scheduled time. When everything is recorded, you will see “All of today's eye drops are recorded”.
If you tapped by mistake, tap “Undo” at the bottom of the screen. Later, you can also tap the recorded row and choose “Undo this record” or “Change the time”.
Record from a notification
When it is time for your eye drops, you will get a notification.
- 1 Long-press the notification.
- 2 Tap “I took it”. The record is saved without opening the app.
When you open the app later, you will see a message like this at the top of the screen:
Recorded "Xalatan" at 08:00 from a notification
If it was a mistake, tap “Undo”.
Record an eye drop without an alarm
If you used an eye drop that has no alarm, tap “Took another eye drop” below today’s list.
- 1 You will see “Which eye drop did you take?”. Choose the eye drop.
- 2 Tap “Just now” if you used it just now, or “Pick a time” if you used it earlier.
For an eye drop you have never recorded, tap “Enter a name”. On the record screen, enter the date, time, eye drop name and memo, then tap “Save”.
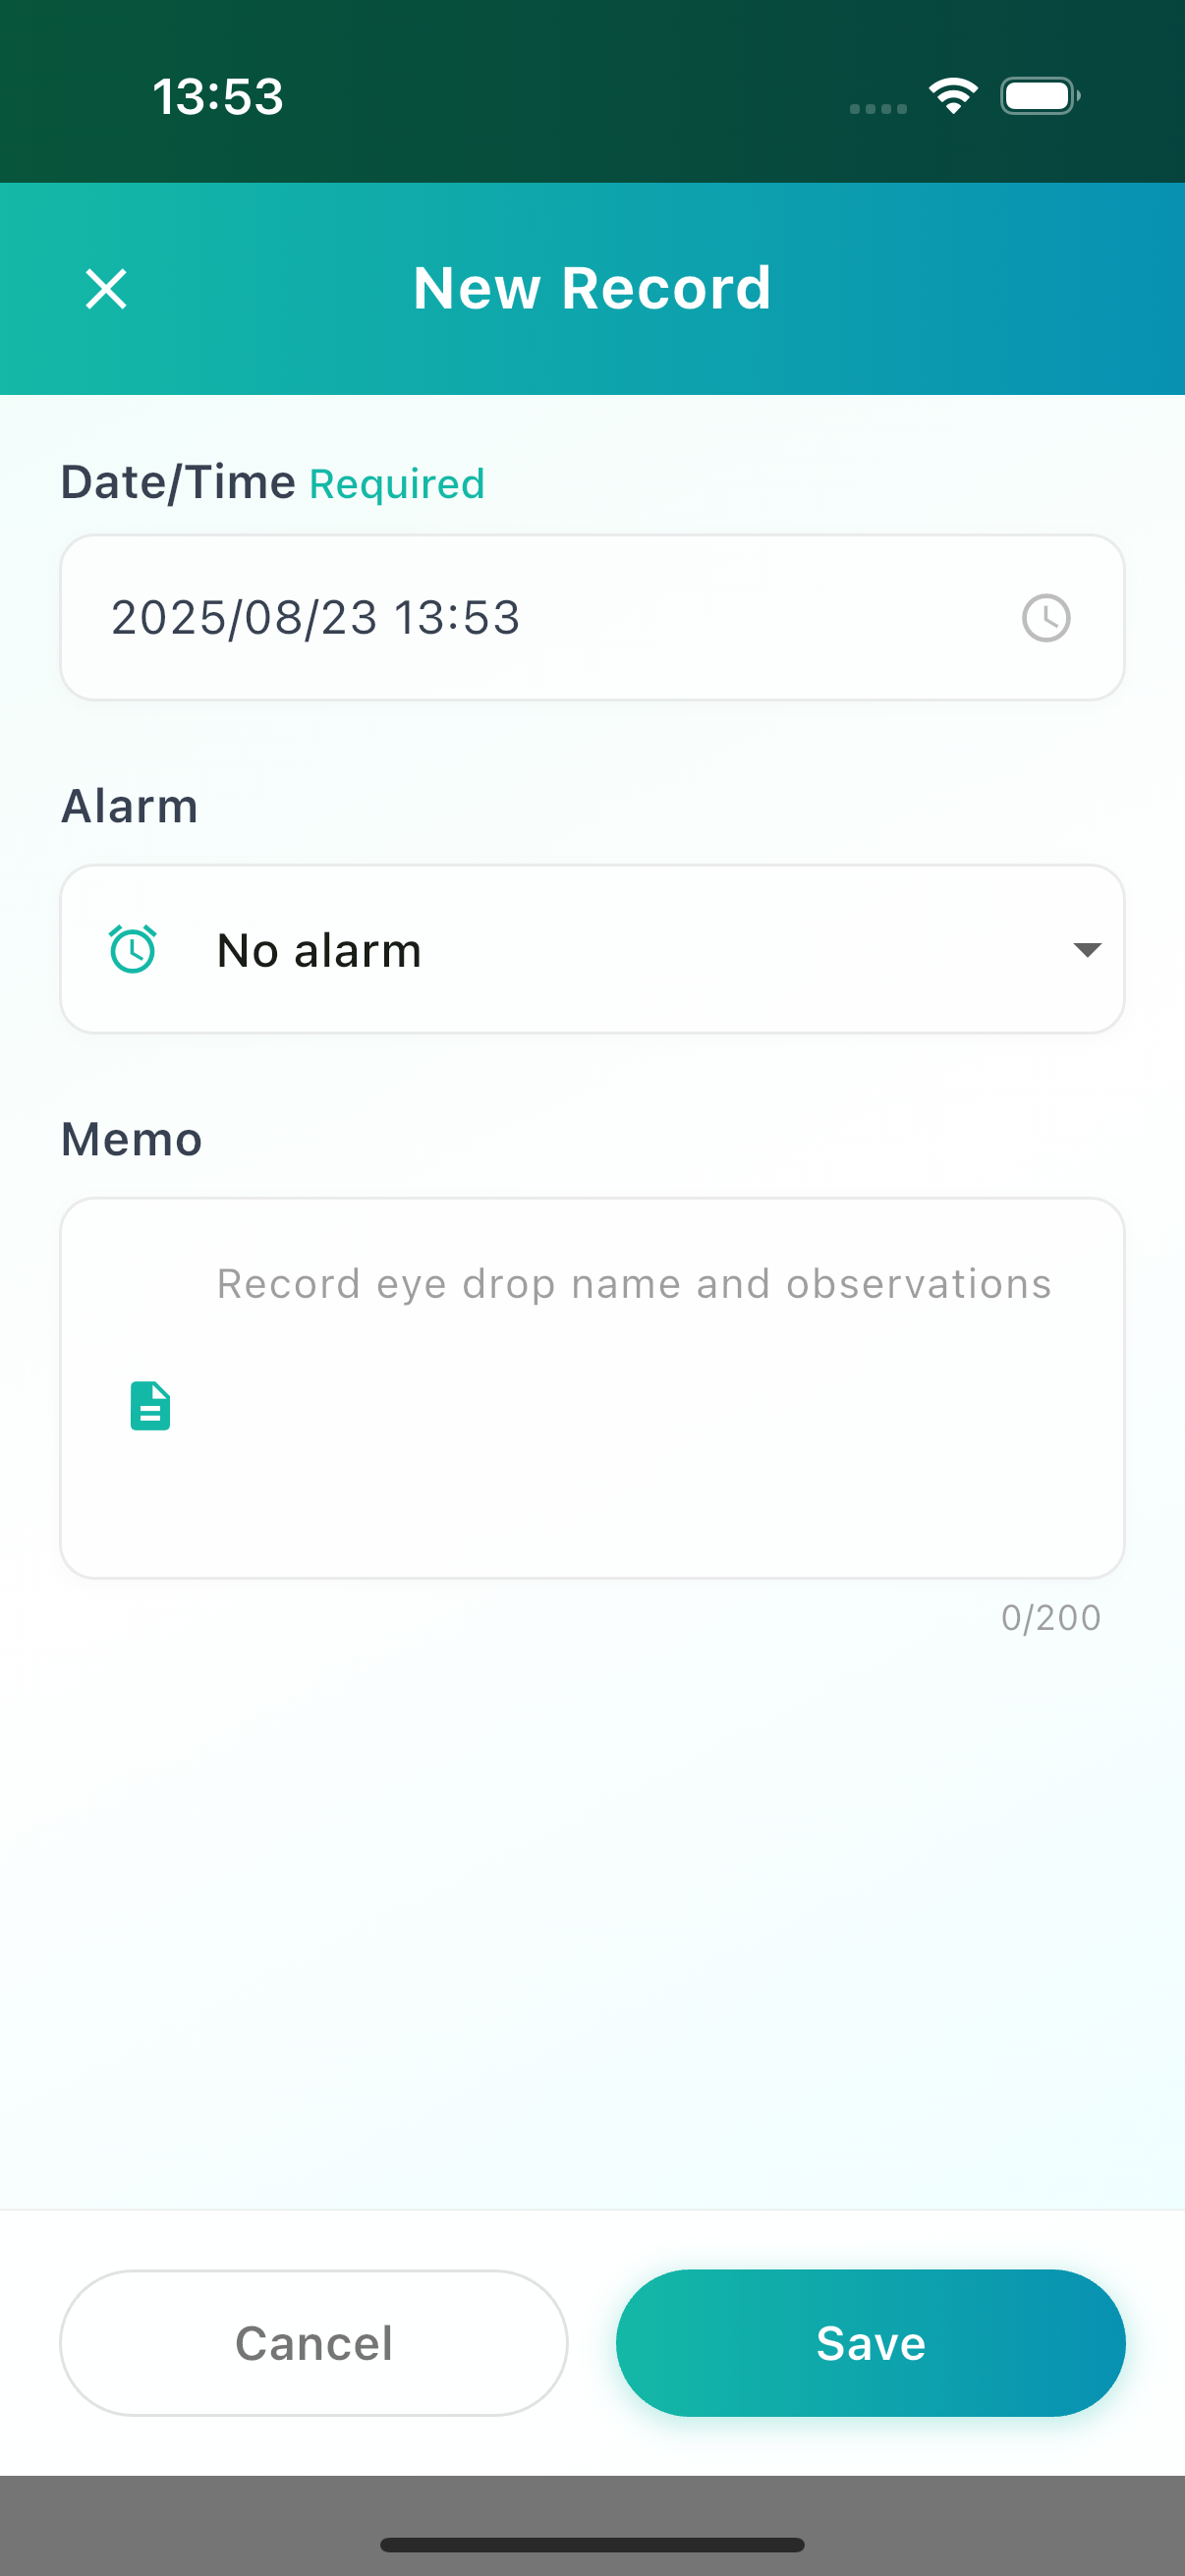
📱 Eye drop record screen
If you have no alarms yet, today’s card shows the buttons “Add an alarm” and “Add an eye drop record”.
Look back at the last 30 days
The “Last 30 days” card shows, for each eye drop, how many days you used it, such as “24/30 days”.
View, edit or delete records
Further down the screen, your past records are listed by date, newest first.
- Tap a record to see the details. Tap “Edit” to change it or “Delete” to remove it.
- You can also use the pencil button (edit) or the trash can button (delete) on the right of each record.
- You will be asked to confirm before a record is deleted. Tap “Delete” to delete it. Right after deleting, you can tap “Undo” to bring it back.
From 7 days before your next visit, a “Next visit” card appears at the top of the screen.
3. Eye Drops & Alarms
Purpose: Register each eye drop and the time you use it. The app reminds you with a notification at that time.
Open the alarm list
On the Eye Drops screen, tap the “Eye drops & alarms” row (“Eye drops, times and sounds”). Your alarms are listed in order of time.
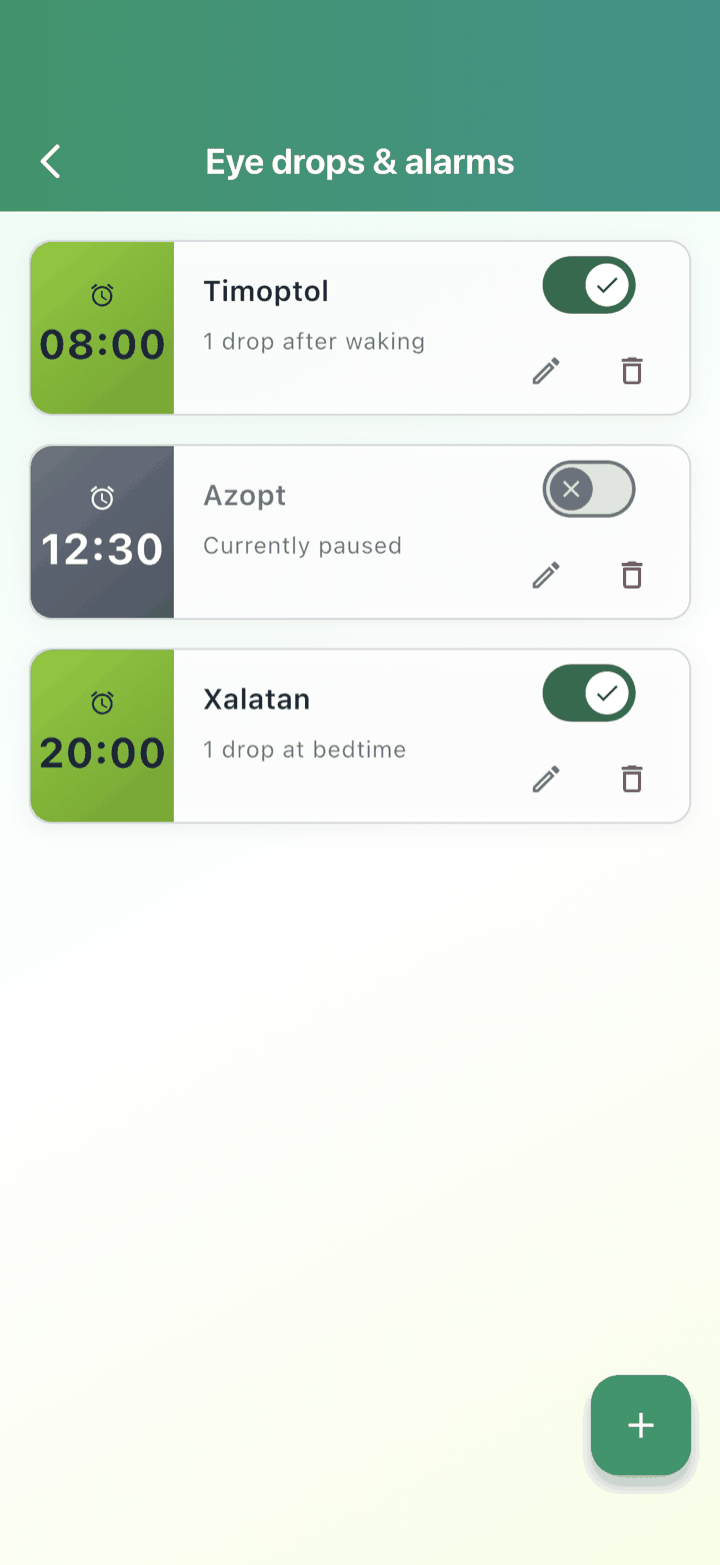
📱 Eye drops & alarms list
Add an alarm
- 1 Tap the round “+” button in the bottom right corner of the list.
- 2 Enter the “Eye drop name”.
- 3 Choose the “Alarm Time”. You can also use the “Morning 8:00”, “Noon 12:00” and “Night 20:00” buttons.
- 4 If you like, choose a “Notification Sound”. Tap “Preview” to hear it.
- 5 Finally, tap “Save”.
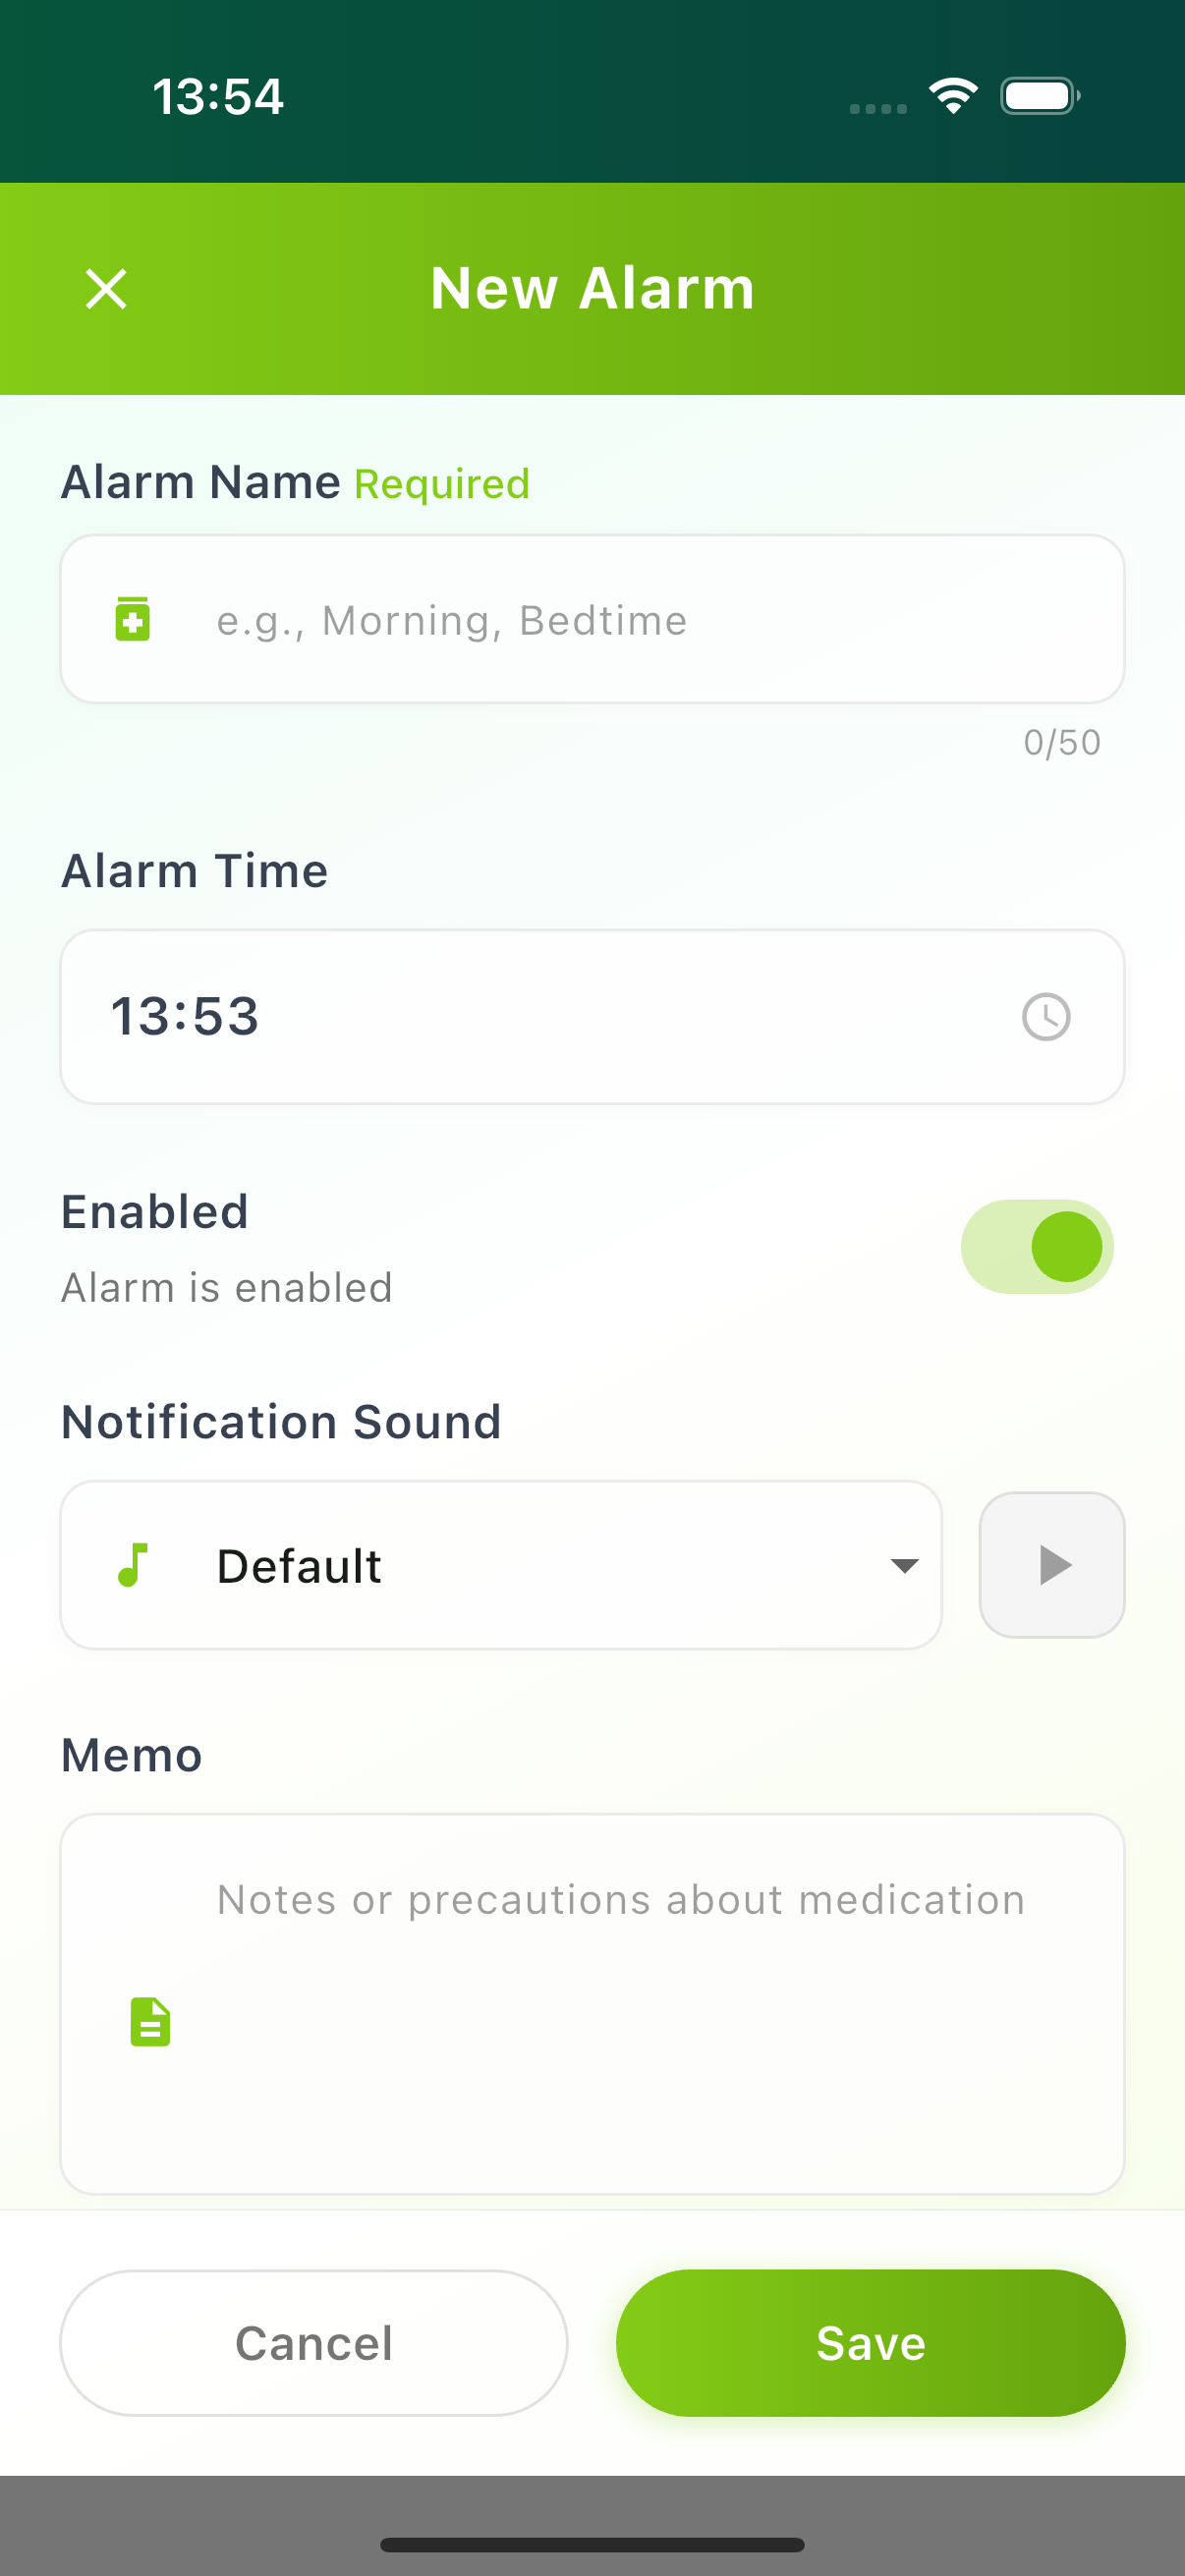
📱 Alarm screen
If you have no alarms yet, you can also use the “Add an alarm” button.
For drops used more than once a day, add one alarm for each time. For example, for an eye drop you use in the morning and at night, create two alarms: “Morning 8:00” and “Night 20:00”.
Turn on “Remind me again in 30 minutes (if not recorded)” to get a second reminder if there is still no record 30 minutes later.
If the time is less than 5 minutes from another alarm, you will see “This alarm is close to another one”. When using more than one eye drop, wait at least 5 minutes between them.
Turn an alarm off or on
Use the switch on the right of each alarm in the list to turn it off or on. An alarm that is turned off is not deleted.
Edit or delete an alarm
- Tap an alarm to see the details. Tap “Edit” to change it or “Delete” to remove it.
- You can also use the pencil button (edit) or the trash can button (delete) on the right.
- Even if you delete an alarm, the eye drop name stays in your past records.
4. Medical Visits
Purpose: Record the results of each visit and see how your eye pressure changes.
List and graph
Tap the “Visits” tab at the bottom. Use “List” and “Graph” at the top of the screen to switch views.
Add a visit record
- 1 On the “List” view, tap the round “+” button in the bottom right corner.
- 2 Enter the “Visit Date” and “Hospital Name”.
- 3 Enter “Eye pressure (R)” and “Eye pressure (L)” (1–99 mmHg).
- 4 Check the tests you had (“Had a visual field test”, “Had OCT / fundus photos”).
- 5 If you have your next appointment, enter the “Next Visit Date/Time”.
- 6 Finally, tap “Save”.
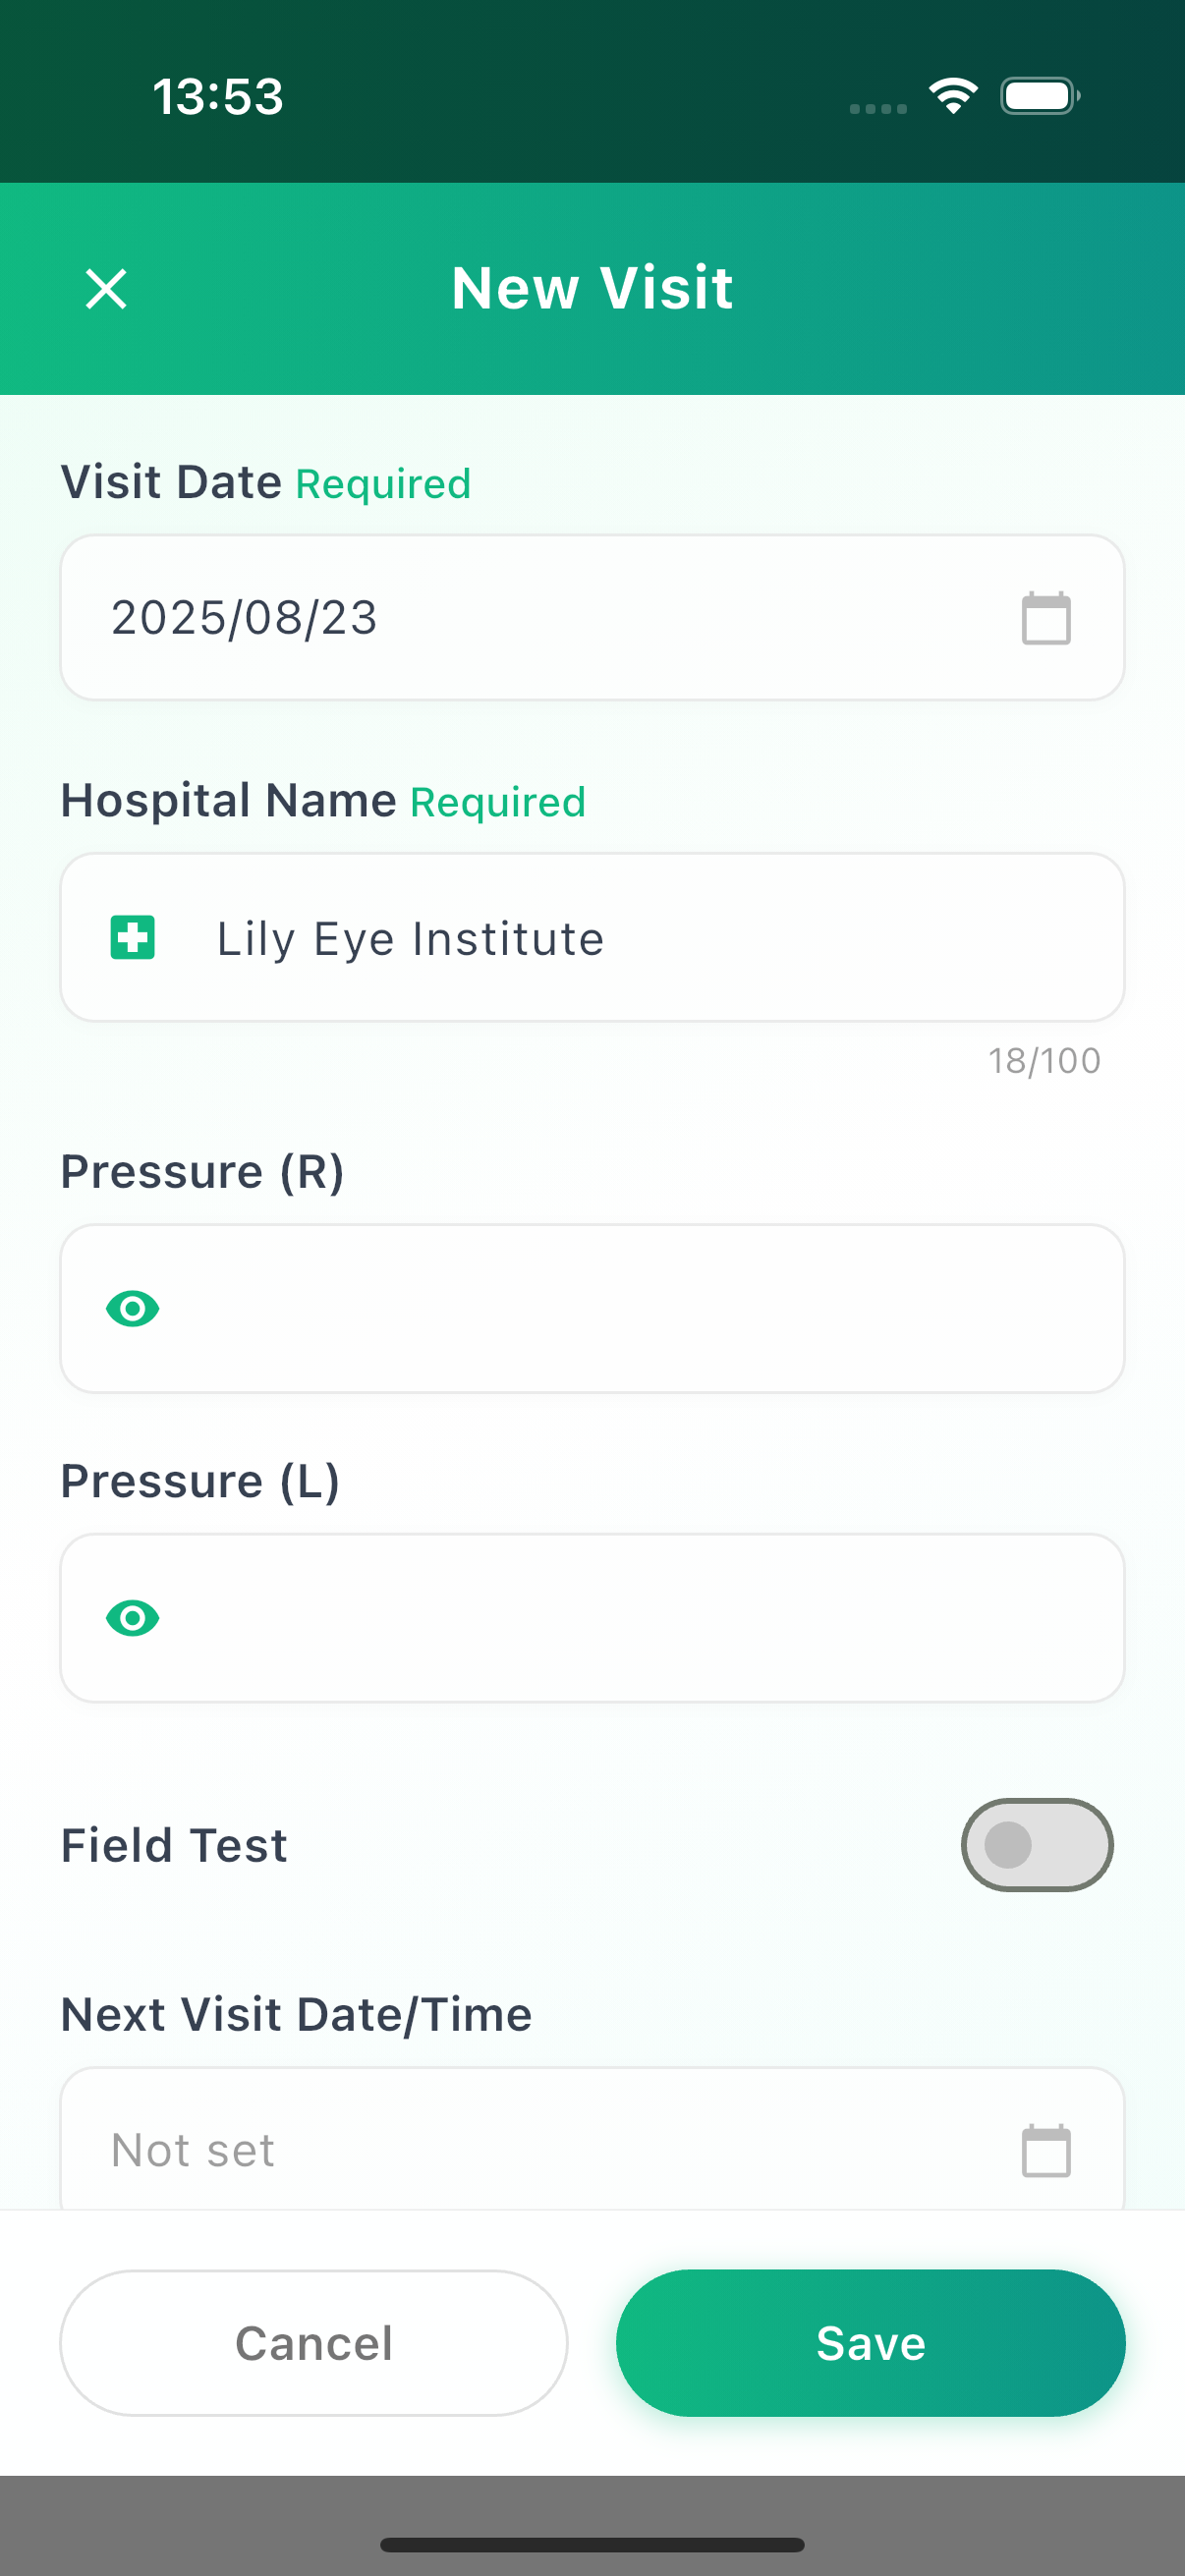
📱 Visit record screen
If you have no records yet, you can also use the “Add a visit record” button.
Eye pressure graph and target pressure
Tap “Graph” to see your eye pressure as a line graph. Choose the period with “3 Months”, “6 Months”, “1 Year” or “All Time”.
Tap “Target Pressure” below the graph to enter a target for your right and left eyes. Enter the value your doctor gave you. If you don’t know it, you can leave it blank. Once entered, a target line appears on the graph.
Eye pressure varies from day to day. Consult your doctor for any decisions.
Don't forget your next visit
When you enter the “Next Visit Date/Time”, a “Next visit” card appears at the top of the list. It also appears on the Eye Drops screen from 7 days before the visit.
The app notifies you at 9:00 the day before and 2 hours before the visit (at 8:00 on the day if you did not enter a time).
If you don’t need these reminders, turn off “Remind me before visits” in “Settings”.
Edit or delete a visit record
- Tap a record to see the details. Tap “Edit” to change it or “Delete” to remove it.
- You can also use the pencil button (edit) or the trash can button (delete) on the right.
- Right after deleting, you can tap “Undo” to bring it back.
5. Settings
Tap the Settings tab at the bottom to open it. The items below appear from top to bottom. Light and dark display follows your device settings.
Remove ads (one-time purchase)
Shown at the very top only while ads are displayed. Pay once and ads are gone for good.
Font Size
Under “Display”. Choose “Standard”, “Large” or “Extra large”.
Notifications
Shows whether notifications are “Allowed” or “Not allowed”. Tap it to open your device’s notification settings.
Show the eye drop name in notifications
When on, notifications show the eye drop name. When off, they only say “Time for your eye drops”.
Remind me before visits
Notifies you at 9:00 the day before your next visit and 2 hours before it.
Back up your data
“Save a backup” saves your records to a file. “Restore from a backup” brings your records back from a saved file (your current records will be replaced). It is a good idea to save a backup before changing phones.
Support
“Support” (FAQ and contact), “How to Use” (this page), “Rate this app”, “About this app”, “Privacy Policy” and the app version.
Ads & Privacy
“Restore purchase” brings back a previous one-time purchase. On iPhone you will also see “Ad Personalization”, and in some regions “Change ad settings”.
Language
Under “Other”. Switch between “日本語” (Japanese) and “English”.
Delete all records
Under “Delete records”. After two confirmations, all records are deleted. This cannot be undone, so save a backup first.
6. Troubleshooting
The alarm does not ring
If you see “Notifications are not allowed, so alarms will not sound”, tap “Open Settings” and allow notifications.
On Android, if notifications are late or missing, go to your device’s Settings > Apps > GlaShield > Battery and choose “Unrestricted”.
When changing phones
- 1 On your current phone, tap “Save a backup” in “Settings” and save the file.
- 2 Install the app on your new phone, tap “Restore from a backup” and choose that file.
- 3 If you bought the one-time purchase to remove ads, tap “Restore purchase”.
Still need help?
Please check the FAQ on our support page or contact us through the inquiry form.
Go to Support Page